SEAN'S TOP 10
Favorite Tools and Materials for building Terrain
Back to the How-To Pages
Back to Necromundicon

Here are the best tools and materials for making scenery Strong, Cheap,
and Fast (my 3 favorite ingredients!).
SUPERGLUE (or CA GLUE) AND BAKING SODA
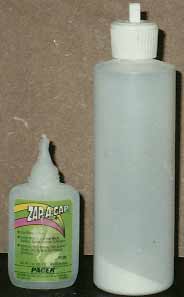
Why these together, you ask? Well as it turns out, Baking
Soda is a great catalyst AND a filler. By blowing a bit of baking
soda powder onto your superglue, it causes it to cure (dry) very quickly,
and helps fill gaps too! This is a safe, cheap alternative to Accelerators
like zip kicker. The only drawback is that it makes the bond slightly
grainy, but for terrain, that can be a good thing. My favorite brand
of Superglue is Zap-A-Gap CA+, available in most hobby stores. Super Jet
is another excellent brand. Baking soda is readily available at the Grocery
store, just transfer it to a plastic squeeze bottle (like the one above)
so it's easy to apply. If you sand both surfaces with coarse sand
paper first, you'll find there's very little that this combo won't stick
to. Try it and see... (For more info on CA glues, check this
site. You can find good prices at this
site if you don't mind paying a little shipping.)
PRE-MIXED CONCRETE PATCH
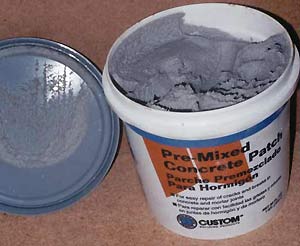
I cannot say enough good things about this "ultimate" filler compound.
You can find it in Hardware / DIY shops. It's easy to use- just open
up the tub, scoop some out on a finger tip or flat stick, and spread it
on ANY clean, dry surface and it will stick. Dabbing it will produce
a ripple effect and ensure a better bond. Good uses for concrete
patch include:
-
GLUE!!! You can actually glue stuff together with concrete
patch! It sticks to plastic (if sanded), wood, stone, cardboard,
porcelain, foam... everything but metal (even then if you sand it enough).
It's best for gluing large, uneven objects (like if you want to glue rocks
down to a base). It's not a replacement for superglue (don't
use it for miniatures!), but it's really handy when making natural terrain.
-
Filling Gaps. Especially when working on natural terrain (stone
structures, dirt trenches, etc.), just mash some into the gaps. For
a cleaner finish, just wipe away the excess with a damp cloth. Great for
blending together castle pieces, basing up trees or trenches, or blending
rubble together.
-
Adding Texture. Goodbye textured paint, hello concrete patch!
This stuff sticks to nearly everything- even porcelain! Just dab
/ stipple it on to add a grainy texture that, when dry, will not crumble
or flake away. You can even texture bases with it! Once cured,
you can rub off any loose grains before painting, but you'll be surprised
how much stays on.
-
Building Up. Use it to represent rubble, dirt, or any other
grainy surface. You can build it up in layers (caution: it can get
heavy) or use it to coat over a basic shape (built up with foam, cardboard,
wood, etc). Either way, your built up surface is sure to be strong-
much stronger than styrofoam or even plaster.
FIBERBOARD
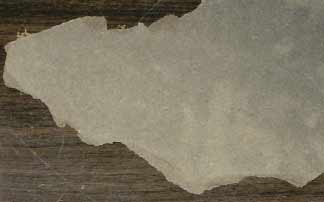
Also known as hardboard, press board, masonite, or HDF board.
All I know is you can find it in most hardware / DIY stores and that
it's cheap. (You can pick up a 2' x 4' sheet at Orchard Supply Hardware
for about 3 bucks.) Get the 1/8" thickness, as it is
plenty sturdy and easier to work with than the heavier stuff.
Pegboard can also be used, though you have to hide the holes so it's
a bit more work and not quite as strong.
Yeah, so what's it for? This is what you want to use for basing
your terrain. It is much stronger than cardboard, and is less prone
to warping. It can be glued using the same glues as cardboard (IE,
white glue, superglue, concrete patch, caulk, hot glue, bubble gum, etc).
If you are using Concrete Patch for filler, you want a stronger base board
anyway.
Okay, so how do I cut it? Well, any saw will cut through it
pretty easily. Or you can actually score and snap it (like sheet
styrene)-- this makes a rougher edge that can be cleaned up with a file,
but is much faster than sawing all the way through. But my favorite
way is to just snap it off in hunks, and then, using a heavy pair of pliers,
tear away chunks of it around the edges by biting and levering upwards.
This creates a ragged edge that is much more natural than the perfectly
smooth, clean curves you see on most terrain bases. The picture above
is of a piece that has already had the edges roughed out this way.
"DREMEL" BRAND MOTO TOOL

This multi-speed, hand held tool can take a wide range of bits, and
works fast. You have to wear safety glasses though, so bits of plastic
don't shoot into your eyeballs. Most Hardware/DIY shops,
and some craft / hobby shops will carry some form of Moto Tool. (Dremel
is my current brand, but Black and Decker makes one that has more torque
and better speed control). My 3 favorite bits are:
-
Metal Grinder bit (in the tool above)-- good for cutting out "keyholes"-
turns your moto tool into a drill saw! Hold at a slight angle to
cut into plastic without having to cut from an edge. Great for making
doorways, window holes, etc. Also good for making small, half
round notches in things like Eldar terrain or for pipeline guides.
-
Fiberglass reinforced Cutoff wheel (left)-- Cuts through plastic
and wood quickly! You can use these to make doorways too- they give you
a straighter line, but you'll have some trouble cutting the corners all
the way through without overcutting (cut from the inside if you can, to
hide overcuts). The fiberglass wheels last MUCH longer than the stone ones,
but cost more. If you need to cut metal, use the stone wheels-
they won't last any longer, but are much cheaper. (Or consider using
a hacksaw instead).
-
Drum Sander (right)-- If you need to remove material quickly,
or sand a curved shape into something, this is a great tool. Use
the rough sandpaper drums- the fine ones tend to clog too quickly.
Like the metal grinder, it can also be used to cut half round notches into
edges.
One last note- a Moto tool is very useful for adding "weathering"
to your terrain, particularly the kind of nicks, scrapes and cuts you would
see on stone, wood, or beaten metal. The Cutoff Wheel is the best
choice for generating these effects, though the other two bits can also
yield good effects. I use two techniques- Tapping (repeatedly
dropping or pressing into the terrain, to form nicks, chips and dents),
and Dragging (lightly drawing the tool along sharp edges and corners to
round them off). Example applications include:
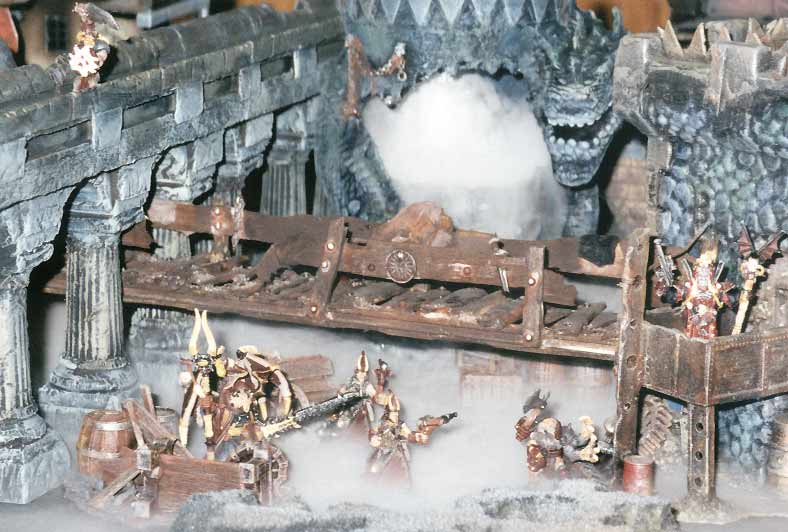
-
Adding score or seperation lines to represent Stone work (best seen in
the Aqueduct and River
pieces)
-
Adding nicks, chips and cracks to make more convincing Stone work (again
best seen in the Aqueduct and River
pieces)
-
Adding dents, chips, and other weathering to Metal work (best seen
in one of the Space Hulk pieces
and most of the Ork terrain).
PLASTIC SPACE MARINE
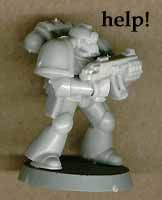
The only way you can really be sure a miniature will
fit into the terrain you're building is to put one in there. Most
models have a 1" base, so try to leave at least that much space
wherever possible on your terrain. An unpainted, based, plastic marine
(with backpack) is a good representative of the kind of room an average
40K model can take up. Aside from leaving enough leg room, head room,
and shoulder room, it's also a good test for how stable your surface is.
If the guy keeps diving off your terrain, consider sanding the surface
down, or adding a flat plate over it, to ensure your terrain will actually
be used. I keep 3 or 4 marines around at all times ('cause I keep
losing them in my work).
RAZOR SAW
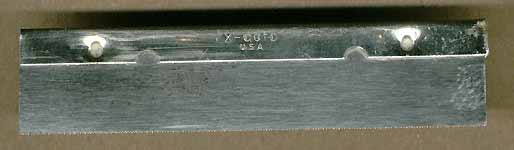
Aside from it's uses as a terrain tool, this fine-toothed, thin bladed
saw is the ultimate tool for conversion work. Use it wherever you
want to preserve both sides of a cut, or wherever you need a neat, clean
line. If you want to save money, just buy the "blades" and don't
bother with a handle (I find I get more control by gripping the blade directly
anyway). Razor Saw (blades) are available in most hobby stores.
TIP: When cutting through pewter, resin, or hard rubber, the blade tends
to "bind", making cutting a slow, laborious process. Speed things
up by rubbing some lip balm (I use Chapstick) directly onto both sides
of the blade. This acts as a lubricant that helps the saw fly right
through for a faster cut!
NIPPY CUTTERS (or DIAGONAL CUTTERS)
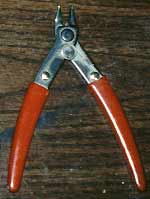
If you don't have a pair of these, you don't know what you're missing!
If nothing else, I have found no faster, cleaner way to remove parts from
sprues. I buy mine at Radio Shack (electronics supply shop) for a
mere $3.99. Use them to quickly trim off bits of plastic, lengths
of wood or wire, or just about anything that will fit inside those little
jaws. Just be careful not to cut hard metal with these, or you risk
damaging the blades. Once the blades are damaged, however,
keep them around for unpleasant jobs like clipping apart your Pewter miniatures.
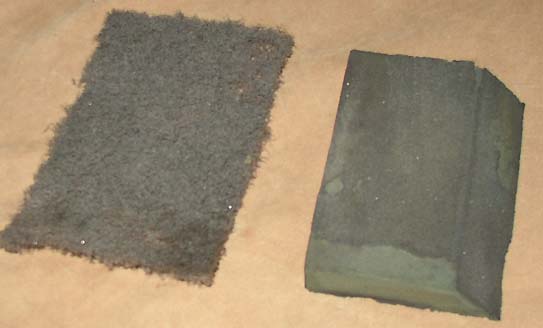
For small parts, I use a Sanding Pad. This is a fancy word for "sandpaper
on a clipboard". Buy sheets of 150 grain sandpaper from your
local hardware / DIY shop and clip it onto a clipboard (available in office
supply shops or stationer's). You now have the ultimate tool for
making small parts flat! Any small parts that need to be glued on
can be rubbed on this pad for a quick, clean sanding. You can even
round the ends of parts off by rubbing them in an orbital motion on the
pad. You can quickly sand strips of material by holding
them down on the pad with one hand and "drawing" them through with the
other hand.
For large parts, you want to sand all the outer surfaces. You
can use sandpaper, but it rips easily and your fingers will get tired when
trying to sand large surfaces. For rough or curved surfaces, use
a stripping pad (below, on the left). These look kind of like scouring
pads, but have abrasives bonded into them like sandpaper does! Although
they will snag on sharp corners or protrusions, they are surprisingly sturdy
and won't tear like sandpaper. For large, smooth surfaces,
use a sanding sponge (below, on the right). This is a foam rubber
block or wedge with a sandpaper surface on the outside. It is easier
to hold than sandpaper, and more flexible than a sanding block. Both
are available in most hardware / DIY shops. Between these three
options, you should have no trouble sanding surfaces quickly and easily.
FOAM RUBBER (or MATTRESS FOAM)
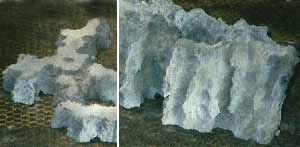
When you need rocks, hills or cliffs, consider foam rubber. The
picture above shows what you can make with foam rubber- the piece on the
left is 1" thick, the one on the right is 4" thick. You can see more
examples in the Gorka Morka and Jungle
terrain. Unlike styrofoam, foam rubber is quite strong.
It won't crumble or crush- in fact, you could run it over with a car and
it springs right back! You can sometimes find it in packaging (the
pads in miniatures blister packs are foam rubber, for example).
Or, you can order online from places like this: KNOX
FOAM COMPANY . Their C grade foam should
be more than adequate. Once painted, it will actually last a while,
especially if you keep it out of the sun (easy to do when you're a hard
core gamer...)
-
Easy to Form. Unlike styrofoam, foam rubber is easy to shape
and to add texture- cut it with a serrated knife, or just tear it apart
with your bare hands! No more hot wire cutter incidents... Once you
have a general shape you like, you can add more detail just by "pinching"
and tearing away small bits of it. This is a great way to make rocky
crags, especially if you rip out vertical strips, forming "gullies".
Note that you can buy it in any thickness, and because it starts out flat
on both sides, you're guaranteed to have a nice, stable surface on top
to put miniatures on, plus you can stack them to make taller formations
if you wish.
-
Easy to Paint. Unlike styrofoam, foam rubber will not "melt"
away when you spray paint it. It even comes in a variety of colors,
though you can spray it to be any color you like if you're persistant.
Build up your colors in layers- for example, for crags I usually start
with flat black, then add grey and brown highlights. When spraying
the highlights, come at it from the sides, so only the edges that stick
out the farthest catch the paint. This emphasizes any shapes you
ripped into it during the forming stage. You can also "dust" it from
above to highlight the top edges- this can be very effective, and very
quick too! The tiny pores in the foam catch spray paint well, so
you won't need to do any hand painting or drybrushing.
-
You can paint with it too! You can use foam rubber to paint
large areas quickly. Just dab the foam into your paint, and dab the
foam over the area to be painted. You'll get a nice, even, grainy
texture that can be put on heavy or light for different shading effects.
This is much like drybrushing, but faster and easier (though not very precise).
-
Also a good tool! When cutting sharp, pokey miniatures with
a razor saw, it is often hard to hold onto the model. Try wrapping
it in a piece of foam for a soft but sure grip (blister pack foam squares
are great for this). Also, when bending metal parts, you can reduce
"tool marks" caused by sharp plier edges by wrapping the piece in foam
first.
HALF-ROUND METAL FILE
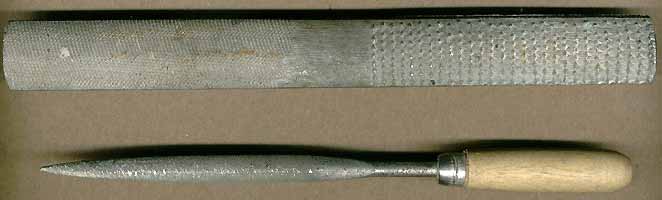
Although the Dremel is fast, versatile and effective,
there will be times when you need a clean, square edge, more control, or
a smaller area of effect. I often find myself "cleaning up" after
the Dremel with a metal file, especially when cutting holes that need to
be square (windows and doors, for eample). They can also be
useful for rounding edges on a large piece (too big to fit on the sanding
pad) or in narrow areas that a Dremel or sanding pad can't reach.
Both of the files above are "half round"- that is, a flat file on one side,
and curved on the other. The less you have to swap tools around,
the more likely you are to use them, I've found...
-
The large file above is even more versatile, as it is a file on one end
and a rasp on the other. Rasps are great for removing material
quickly, especially materials like wood or resin. Though the Dremel
is normally the tool of choice for removing material, it generates a lot
of dust- the Rasp doesn't have that problem, generating larger grains instead
that are easier to clean up.
-
The smaller file is useful for cleaning up small holes, and is good for
cleaning up miniatures too! I normally don't worry about having handles
on my files, but this one came with one anyway, and comes in handy when
more pressure needs to be applied to the job...
Well, there you have it. I left out a bunch of great materials
(it's a top TEN list, after all) so be sure to check them out too.
Back to the How-To Pages
Back to Necromundicon