![]()
PRIMING
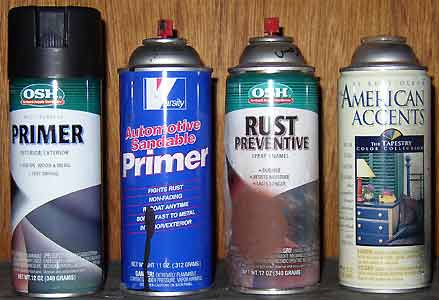
The first step to painting the table was to base coat it with spray
paint. It's not easy to find flat spraypaint in colors like brown
and tan, so I usually resort to satin finish for the lighter colors.
Flat black primer is readily available though, and I found a rust resistant
primer red that was nice and dark (more brown than orange). Here's
the paint I used (from L to R): Flat black primer (enamel), Flat black
primer (laquer), Flat "red" (rust) primer, Satin finish paint (I believe
the color is called Walnut or Almond). All were bought at Orchard
Supply Hardware except the Varsity laquer primer, which I got at PEP boys.
None of these cost more than $3 a can, by the way!
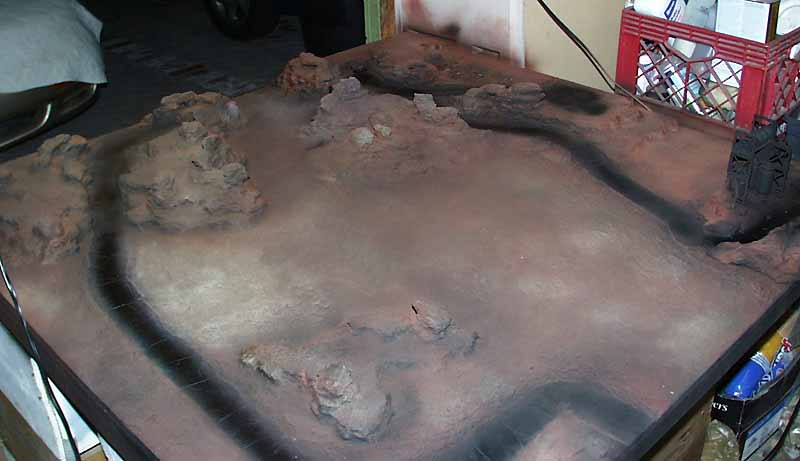
I started by priming the edges of all the rocks black. I tried
to spray from down low at an upward angle so I'd be hitting mostly the
undersides of the rocks. I then sprayed the rust primer over everything.
Then to darken the rust primer color, I "dusted" it with flat black (just
a faint spray from far away). Next, I dusted with the beige color
to lighten everything up, especially the flat sandy areas. Wherever
I got too close and it got too light, I'd go back with another light dusting
of rust and black. Once all that was done, I sprayed flat black laquer
just over the roads. The laquer dries quickly so I could get real
close to the road without worrying about streaking or getting that glossy
overspray effect- plus, the laquer black dries lighter than the enamel,
making a better base color for the soon-to-be-grey roads. After
several hours (and several cans of paint), I finally had something like
this...
DRYBRUSHING
The next step was drybrushing. Chris
Cates helped a lot here, painting almost all of the rocks himself (I
would have helped more, but he was doing such a nice job...) For
this, we used acrylic craft paint since it was cheap and easy to clean
up (water based). Here's a shot of all the different colors we used:

Folk Art is a great brand for color range- from L to R: Coffee bean,
Raw Sienna, Nutmeg, and Honeycomb (our favorite color). At $2 a bottle,
the price is right too. I bought the Crafter's Edition paints (Ivory,
Grey, Black) because they were on sale for $1 each.
We used house paint brushes to drybrush the acrylic
on. An old plastic TV dinner tray made a nice palette. Also
pictured here is some foam, which we later used to paint the flat, sandy
areas of the table (more on that below).

Starting with Coffee Bean (dark brown), we blended the different shades
of brown by hand to make about 5 stages of color, getting lighter with
each stage. Here's what the rocks looked like after about 3 stages:
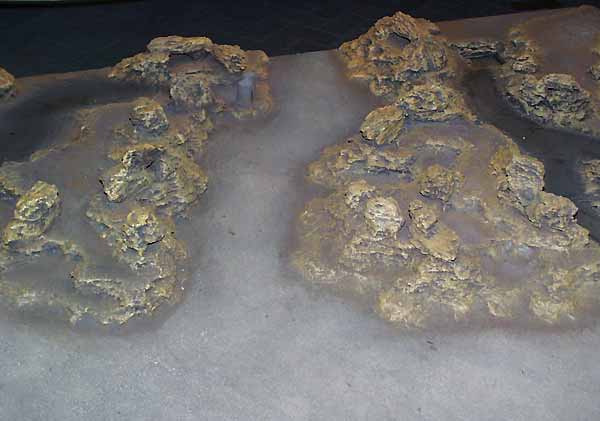
Each layer was put on more lightly than the last, with the final layer
being a sort of greyish ivory color. In the shot below, you can see the
rocks have been painted- but all of the flat areas are still waiting for
their paint. The tan bark has loads of detail and really picks up
drybrushing well.
To paint the wide open areas of sand, and the flat areas in the hills, I did a lot of experimenting. Because the paint I was using was much lighter than the base coat, no matter how I put the paint on, it always came out too splotchy and contrasty.
I even used chunks of mattress foam (foam rubber / sponge foam: seen pictured above) to apply the paint, but still had some trouble- and in disgust, I tried to rub the paint off with a clean piece of foam. It didn't come off entirely, but it DID spread and blend the paint nicely, leaving a much more even and subtle shading of color. Eureka! With new confidence, Chris and I dabbed paint on and rubbed it down all over the table. Using this "apply and rub down" method, we managed to paint all of the sandy and flat areas in record time. We destroyed a few foam blocks though... After a quick "dusting off" to remove the little foam chunks, the table was nearly complete.
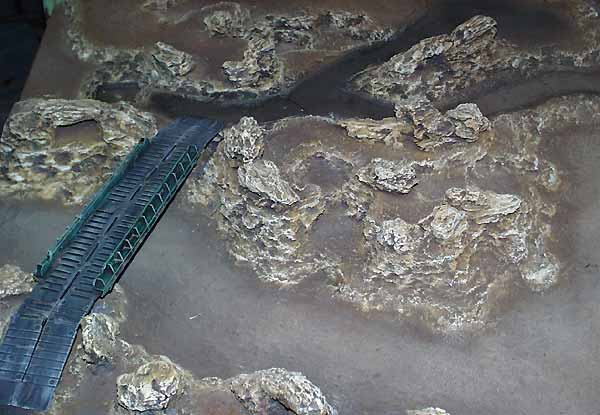
Click here to see a completed shot of roads, sand and rocks.
To paint the roads, we used foam sponges again, this time with grey and brown colors. We rubbed along the direction of travel to create streaks along the length of the road, more like track. To paint the dirt road, I simply used brushes to drybrush dark streaks along the direction of travel (the tracks had previously been built up by dragging my fingers through the concrete patch.
All of the buildings were painted using my traditional methods of black primer, drybrushing, and washes. All of the "decals" are actually stickers from Zoids toys- these are faster to apply and stronger than decals, and have a clear backing so they look almost as good. After sticking them on, I painted over them with a coat of flat laquer so they weren't so shiny.
See the completed Mechwarrior Table!
Back to the How To pages
Back to Necromundicon