![]()
SURFACING BY CONCRETE PATCH?
To get that sandy, rocky look on flat surfaces, most terrain builders
will glue sand onto the table. This process is time consuming, and
the sand never seems to stay on there- there's always a few grains that
rub off in the middle of the game. So we used one of my favorite
materials to surface the table: concrete
patch! All the flat areas (except where roads would be) were
coated with a thin layer of concrete patch. We mostly just spread
it on with our fingers, and dabbed at it to get a bit of texture.
Once dry, the stuff is rock hard, sticks real well, and has a nice texture
to it.
ROCKS FROM TAN BARK?
Although the layers of sound board built up some nice elevation, I
still wanted some taller rock spires to help give the feeling of height
and to provide some cover. Traditionally these kinds of rocks are
carved out of foam, but I wanted something stronger and faster. I
had discovered the amazing adhesive properties of Concrete Patch earlier
on, so I knew I could stick garden rocks, etc. on. But I wanted something
with more layered texture, that is still strong, light, and plentiful.
Pine Bark was the answer! Basically, it's bark from redwood or pine trees, broken up into little chunks about the size of a large egg. You can find this stuff in landscaping, playgrounds, and schools. Ironically enough, I tried to buy some, but the kind they had at the local nursery was too small. I wanted big chunks, so I actually grabbed a sack full from around my building at work.
I used concrete patch to glue chunks of tan bark to the sound board-
and then built up spires and arches by gluing more pine bark on top of
the first layer of bark. The concrete patch fills any gaps between
the pieces, so if you have even a mediocre fit, no filing is required to
get a good bond. I'd scrape off any excess concrete patch if needed,
but soon got the hang of the right amount to use. Once dry, I could
actually grab the top of a spire and shake the whole table with it- the
bond (and the bark) is that strong...
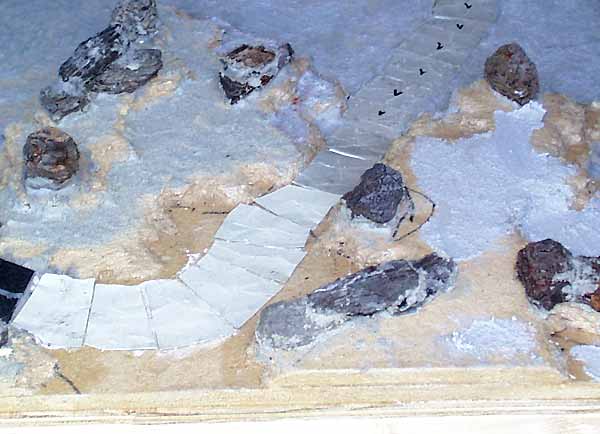
ROADS FROM CARDBOARD?
Instead of the traditional "flat, boring asphalt" road, I wanted the
roads to look like cracked pavement slabs, kind of old and heavy.
To represent slabs, we cut out "squares" of cardboard. To make them
look cracked, we just folded them at various angles to create creases and
wrinkles, then flattened them back out and glued them down with white glue.
We were careful to keep a consistent width, and had to cut some squares
at an angle to form turns, but otherwise the size and shape of the
squares could be pretty chaotic and random. The end result is a very
interesting road that looks well used and weathered.
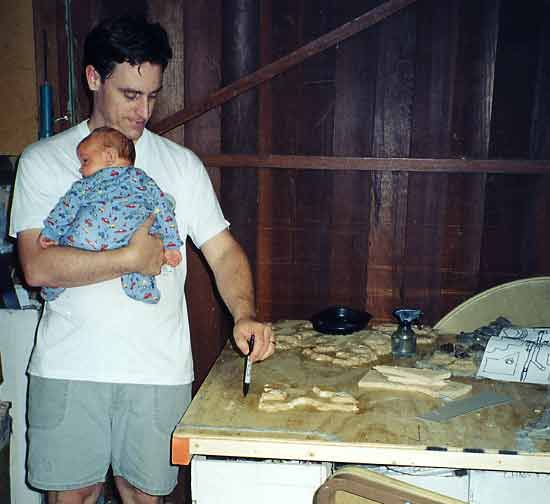
Typical activity at 2 AM. Here I am marking out the paths of
the roads...
OH YEAH, THE BRIDGE.
The bridge is pretty simple. The siding is made from parts of
an HO scale train bridge. It is attached to lengths of plastic Shims
- most hardware stores carry wood shims, but if you can find the plastic
ones, they have great detail.

For the long bridge, I spliced lengths of shim together by gluing
strips of sheet styrene (plasticard) underneath. To hold the bridge
up, I glued down 2 "pylons" (cork stoppers) on each end. To make
the ramps at either end, I used the narrow ends of the shims and attached
them at a slight angle. Then to get a perfect match up I shaped the
sound board "ground" at either end with a rasp.
(By the way, I used more plastic shims to form small bridges over the pipeline on the second half of the table. These have no railings and are pretty short but still double wide to match the road width).
You can see all kinds of construction mayhem going on simultaneously in this shot, including the cork foundations (I glued the bridge on after painting it, and the table, seperately). Also visible is a bottle of white (PVA) glue, tubs of concrete patch, and someone's hand laying out cardboard squares for the road... and this is just the first table half!
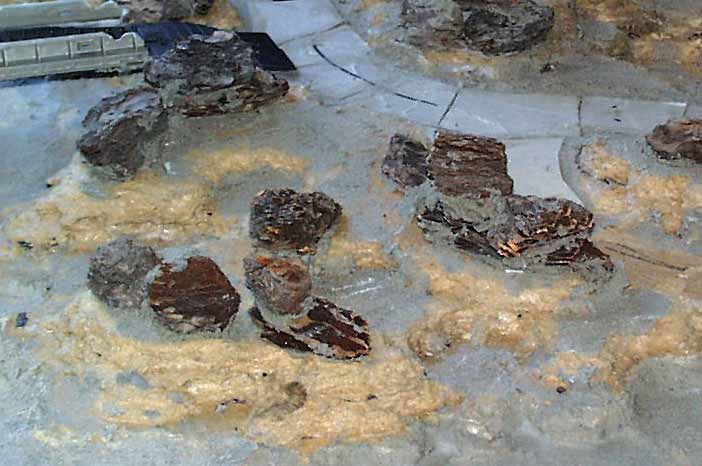
HALF WAY THERE...
Here's a shot of the entire first table half, complete with roads, concrete patch surfacing, and glued down tan bark rocks. It's ready for painting!
On to Part 3: Buildings
See the completed Mechwarrior Table
Back to the How To pages
Back to Necromundicon