
A Fast and Silly Tabletop game of Mobile Suit Battles
By Sean Patten

OVERVIEW
SD ERA is a tabletop game that
puts those cute SD Gundam figures to good use. A
complete Mobile Suit battle can be played out while you are
waiting for your food at a restaurant!
COMPONENTS
To play SD ERA, you
will need:
![]() ON YOUR TURN
ON YOUR TURN
When it's your turn,
you may do TWO things with each of your Units. These
things are called ACTIONS. Continue until ALL of
your Units have done two actions (or chosen to do
nothing). Then it's the next player's turn!
Continue around the board until the mission has ended (see
MISSIONS below for how to end a mission).
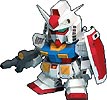 MOBILE SUITS and other
UNITS
 VALUE. All
units
have
a
VALUE,
typically
between
1
and
5.
This
is
the
base
number
of
DICE
the
unit
rolls
when
shooting,
meleeing,
or
defending.
This
is
also
the
COST
of the unit!
| VALUE |
EXAMPLES |
| 1 | Ball, Magella Attack |
| 2 | Zaku, GM, Gaza C |
| 3 | Dom, Guncannon, Rick Dias |
| 4 | Gelgoog, Gundam, Qubeley |
| 5 | Ziong, ZZ, Alpha Azieru |
| Letter | SPECIAL | EXAMPLES | ABILITY |
| A | ARTILLERY | Guntank,FAZZ |
May ignore range penalties. |
| B | BITS |
Qubeley,Sazabi |
May shoot in any direction
from any position within 1 stick of your unit. |
| C | CHEAP | Zaku, GM |
-1 die when
defending. Cost
-1 point. (Value 2 or 3 units only). |
| F | FAST | Zeta, Gabthley |
May make an additional free
move at the END of your turn. |
| H | HIDE | Zgok, Aggai |
May hide at the start of
the game, or as an action. Anyone may attack a
hidden unit, but if they win the attack, the unit just
becomes unhidden instead of taking knockback, stun, or
damage. The only exception is if another hidden
unit attacks a hidden unit- then the hidden defender
will take damage as normal. Hidden units get +1
die when attacking, but become unhidden. |
| M | MELEE | Gouf, Dreissen |
+1 die when attacking or
defending in melee. If you lose when attacking in
melee, treat as a tie instead. |
| S | SPRAY | Bigzam | When shooting, you may split your attack dice up across multiple targets. |
| T | TRANSPORT | Musai, Megarider |
May pick up, carry, or drop
off friendly units as part of your move. Your
value is the number of units you may transport at a
time. May not attack in melee. |
| V | VETERAN | Gundam, Char |
You may reroll one of your
own dice when attacking or defending. |
 |
KING OF THE HILL |
| SET UP | Place a hill or other terrain
in the middle of the board, that can only hold one unit on
top. Players start on any board edge. |
| SPECIAL | Only one unit
can occupy the top of the hill at a time.
Units on the hill cannot be Hidden. Units can be
knocked off the hill by any attack that does
knockback. If you knock a unit off with melee, you
may take their place on the hill. A unit on the hill may spend 1 action to collect a token. Each player may earn a maximum of one token per turn. |
| WINNING | The winner is the first
player to collect three tokens! |
 |
SOCCER |
| SET UP | Place a ball in the center of the board. For 3 or more players, place two balls! Players start on any board edge. Place a goal in the center of each player's start point, 1 stick wide. |
| SPECIAL |
The soccer ball can be moved
with knockback just like a unit, and defends itself with 2
dice. If knocked into TERRAIN or a board edge, it will
bounce off of anything it hits, moving 1 stick away at the
angle
of reflection. BALL HITS UNIT: The ball melees the unit, rolling the # of dice of the attack that sent it that way. If the ball wins, the unit is stunned and the ball finishes its move! If the defending unit wins with overkill, they may knock the ball as melee. Any other result and the ball will stop. BALL HITS BALL: The first ball stops, and the second ball moves directly away from the first, moving 1 stick. UNIT HITS BALL: The unit is stunned. Roll 2 dice against the ball (which defends with 2 dice). A player earns 1 token each time they shoot or melee the soccer ball into any opponent's goal. After a ball makes it into a goal, immediately place it back at the center of the table and continue playing as normal. |
| WINNING |
The winner is
the first player to score three goals! |
 |
KICK-BOMB |
| SET UP | This is a good mission for
smaller boards, between 4-6 sticks long per side.
Place a bomb in the center of the board. For 3 or more players, place two
bombs! Players start
on any board edge. Players start with 3 tokens each. |
| SPECIAL |
The BOMB can be moved just
like the soccer ball in the soccer scenario above. At the end of each players' turn, roll to see if the bomb(s) explode (start with the bomb that has the most dice). Bombs start with one "explode" die. Roll the explode die or dice- If NO 6 is rolled, ADD another explode die to the bomb (keep the dice with the bomb). If a 6 is rolled, the bomb EXPLODES! ( Reset the bomb in the board center with 1 die.) All units within 1 stick of an exploding bomb will be hit! Hit units become stunned if they weren't already. For EACH unit of yours that is hit by the bomb, lose 1 token. You may continue to play even if you have no tokens. |
| WINNING |
The last
player to have any tokens wins! |
 |
RING BATTLE |
| SET UP | Set up a ring
in the middle of the table, with about a 3 stick
radius. Units may start anywhere in the ring, or
outside the ring near the player's table edge. Take
turns placing units in the same order as the turn order,
then start. NOTE that units may not HIDE during a
ring battle- treat them as veterans instead. |
| SPECIAL |
Units inside the ring may
attack any non-stunned unit inside or outside the ring.
When a unit is knocked out of the ring, place them
just outside the ring in front of the player who owns the
unit. Units outside the ring may perform any of these actions on their turn: 1. CHEER- place one "cheer" die next to any unit in the ring. That unit may add cheer dice to any die roll any time they wish! Remove cheer dice after they have been used. 2. ATTACK other units outside the ring with ranged or melee attacks. 3. MOVE around the outside of the ring in either direction. May move past enemy units. May melee at the end of a move. 4. BREAK IN- Roll dice as if making a ranged attack. If all the dice roll the same number, you have broken into the ring! Place your unit just inside the ring- you are now another contestant! Any time a unit outside the ring loses a combat, they are automatically stunned, and the attacker earns 1 CHEER. |
| WINNING |
The last
player to have a unit or units in the ring is the winner! |
 |
EGG HUNT |
| SET UP | Get 6 plastic
eggs together per player. Randomly put the following
into eggs: One egg per player with a cheap unit from
that player's army. One egg with a bomb per
player. One egg with candy inside. Three eggs
with two credits each inside. Then add one
more egg with a 4 point BOSS unit inside that will attack
everybody! Then randomly place the eggs evenly
around the board, and some scenery the eggs can be knocked
into. Players start on any board edge. |
| SPECIAL |
Eggs defend with one die, and
can take knockback just like a unit. Instead of
taking a STUN, an egg will BREAK OPEN, revealing whatever
is inside! Any unit may pick up a credit by
spending an action adjacent to it. Candy can be
eaten by the player that broke the egg, but has no other
value. UNITS in an egg may make one immediate
free attack with +1 die, then join the army they belong to
on their next turn. BOMBS immediately roll two dice
and explode on a 6, stunning anyone within 1 stick.
Add another die and check at the start of each player's
turn until it explodes! Any eggs caught in the blast
will be blown open. The BOSS unit will ambush anyone
nearby. Whoever stuns the boss unit will earn +3
credits- remove the boss from play. |
| WINNING |
The game ends
when all the eggs have been opened, all the tokens have
been collected, and the boss has been defeated. The
player with the most tokens wins (remember, defeating the
boss is worth 3 credits). |
 |
SHOOTING GALLERY |
| SET UP | Each player
must buy a MINIMUM of 3 units, no maximum! Set up a
small table, about 2 feet square, with terrain spread
evenly. Players start on any board edge. |
| SPECIAL |
Earn 1 token each time you
STUN any enemy unit. Remember knockback into
terrain, another unit, or the board edge will cause a
STUN. |
| WINNING |
The first
player to earn five tokens wins! |
 |
SAFARI |
| SET UP | You'll need
some plastic toy animals or dinosaurs for this scenario,
about four per player. Assign a value to each
animal, from one to four points. This is how many
dice they roll. Place the animals evenly around the
board, at least 2 sticks from any board edge. |
| SPECIAL |
To capture an animal, it must
first be stunned. Instead of taking knockback, any
successful attack on an animal will stun them. Then
you must spend an action to pick it up (transports merely
have to move past it). You must then carry the
stunned animal to any board edge to capture it.
Carrying it takes no actions, but if you take any
knockback while carrying, you will drop the animal!
Animals that win with overkill while defending in melee
will do knockback directly away from them. After the last player's turn, the animals get their own turn. First, any animal that is stunned may roll their dice to try to recover from being stunned. If they roll a 6, they are no longer stunned. Carried units that recover from stun are no longer carried! Next, for each animal that is within 1 stick of any player unit (except hidden units), roll the animal's dice. If they roll a 6, they will charge the nearest unit, attacking in melee with +1 die! If they win, they will do knockback in the direction of their move. If they don't charge, they will move 1 stick directly away from the nearest unit instead. |
| WINNING |
Game ends when
all the animals have been captured. The player with
the most points of animals wins! |
 |
CONVOY (Friendly Mission) |
| SET UP | In this game, all the players work together to protect a ship, so they can't attack each other, but they can compete for points. All the players should pick four points of units from the same side (or sides that can be allies). Then gather up a pool of "enemy" units (anything but transports) and keep them handy. You'll need a large toy ship for the players to protect- place it at one end of the board, pointing toward the other board end. Finally, place about 10 rocks spread evenly all around the board to represent asteroids. At the start of the game, the enemies go first... |
| SPECIAL |
ENEMY TURN: Move
the ship one stick forward. Then, each player draw
one random enemy unit and place it behind the nearest
unoccupied asteroid. Then, starting with the enemy
unit closest to the ship,
each enemy unit moves and shoots their target. If
moving towards a player unit will bring them closer to the
ship, they will target the unit. Otherwise, they will target
the ship.
When attacking, special enemy types use different tactics,
as follows: A=
Always target the ship, and only move enough to get a
clear shot. F= After attacking,
try to move out of range or view of player units. H= as normal, but
they get +1 die on their first turn's attack. M= If the target is
within 2 sticks, move and melee instead- can't be damaged
by the ship when attacking in melee. V= as normal, but
don't forget that reroll! THE SHIP: If the ship is attacked, it defends itself with 4 dice. If the ship is DAMAGED, it won't take knockback- instead, players must roll one die for each enemy unit they have captured (see below). Whoever has the highest roll must GIVE UP one of their captured units, returning it to the pool of available enemy units! If the players with the highest rolls TIE, than no one has to give up a unit. PLAYER TURN: After the enemy units have attacked, the players should roll off to see who goes first- roll dice for your most powerful unit. Players complete their turns in turn order from highest roll to lowest. To CAPTURE an enemy unit, players must stun them by knocking them into an asteroid, the board edge, another unit, or the ship itself (treat as a 1 die attack against the ship). AND SO ON: After the players take their turns, run another ENEMY turn as above- the ship moves 1 stick forward again, but from now on, each player may decide whether to draw and place none, one, or two random enemy units. After the enemy turn is another player turn, and so on, until the game ends (see below). |
| WINNING |
The game ends
if the ship makes it off the far end of the board, or if
the pool of enemy units runs out. Whichever player
has the most points of captured enemy units is the winner! |
 |
BATTLE ZONES (Friendly
Mission) |
| SET UP | You will need a set of Zone Cards and Blips- print these onto card stock, cut them out, and shuffle them face down. Divide the board into zones (4 is usually good), as wide as the table and about 12 inches long. (you can have more or less if you like). Use string to form lines between each zone. Then place two Blips per player in each zone, face down, spread evenly throughout the zone. Players can then choose units- 6 points is good, and a maximum of 3 units per player. Everyone starts at one end of the board, at the edge of the first zone. |
| SPECIAL |
REVEALING BLIPS: Unless
otherwise noted by the Zone Rules, rules for blips are
described below. To reveal a blip, you must touch it as
part of your move. This ends your move, and the blip
might ambush, but you may still make a free melee attack
at the end of the move that revealed the blip. Blips
are as follows: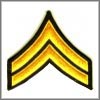 AMBUSH 2. Place a 2C enemy unit there- it immediately ambushes, making a free shooting attack on the revealing unit. If it wins, knockback is in the direction of the starting edge of the board. Any attack that knocks the 2C unit into terrain or out of the Zone defeats it- remove the unit, and whomever defeats it earns the blip. 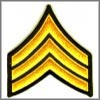 AMBUSH 3. Place a 3 point enemy unit there of any type. It ambushes and can be defeated in the same way as the 2 blip above. Whomever defeats it earns the blip. 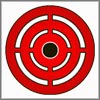 TARGET. This static target defends with 3 dice. Whomever destroys it earns the blip.  BOMB. When revealed,
roll 1 die: on a 6, the bomb blows up, stunning the
revealing unit! The bomb may be knocked back just
like a unit, and defends with 2 dice. If a bomb is
knocked into another unit, it immediately blows up, taking
out the enemy unit or stunning the friendly one. If
the bomb takes out an enemy unit, give the bomb blip to
the last player to touch the bomb. If a bomb hits
another bomb or any scenery, it just stops moving. BOMB. When revealed,
roll 1 die: on a 6, the bomb blows up, stunning the
revealing unit! The bomb may be knocked back just
like a unit, and defends with 2 dice. If a bomb is
knocked into another unit, it immediately blows up, taking
out the enemy unit or stunning the friendly one. If
the bomb takes out an enemy unit, give the bomb blip to
the last player to touch the bomb. If a bomb hits
another bomb or any scenery, it just stops moving. ENEMY TURN: After the last player's turn is the ENEMY TURN. Roll 1 die for any BOMBS on the board at the start of the enemy turn. On a 6, they explode, doing a stun to any units, friendly or enemy, within 1 stick. Next, any revealed ENEMY UNITS will move in front of the closest player unit, and attack it (usually by shooting). Any knockback from enemy attacks will push the player unit back towards the start. After the enemy turn is complete, it is the first player's turn again. ZONE SPECIAL RULES: When first entering a zone, draw a ZONE CARD and play it face up. It will have additional rules or exceptions to the blip rules above. The zone rules apply to everything in that zone. NO ONE MAY LEAVE a zone until it has been "cleared". The requirements for CLEARING A ZONE are defeating all enemies and targets, unless otherwise noted on the Zone Card. Once cleared, units may move into the next zone- draw a new Zone Card for the new zone and proceed as instructed. You may linger behind in cleared out zones, but you might miss out on the action! |
| WINNING |
The game ends
when the last zone has been cleared. The player who
earned the most blips wins! |
 EXAMPLE UNIT STATS
|
|
|
|
|
|